Some Texture Pointers

Texture Resource:  CGTextures

Texture Placement Grid 

CrazyBump (we have a site license for this)

Some tools used:

  • Create Polygon Tool
  • Append Polygon Tool
  • X key to toggle snap to grid when using move tool
  • UV snapshot >  Targa > 512 x 512
  • Save texture in the sourceimages in the project folder
  • Photoshop
  • One PSD file for all data for your data
  • Name layers in your photoshop file
  • UV snapshot on the top> Blend mode screen and the background layer black
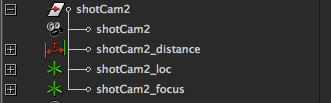
  • Name Materials
  • Fast seamless tile: Duplicate layer then filter>offset  and then create layer mask and the gradient
  • One powers of 2 higher than what size your texture is going to be
  • Overlap texture/ add drop shadow to give a feeling of and edge
  • Merge Meshes
  • Blinn and turn off reflectivity
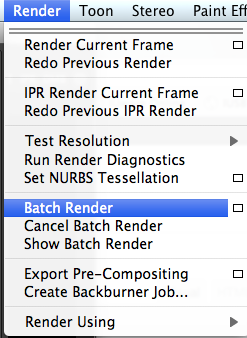
  • Renderer to High Quality Renderer
  • Lighting Use all Lights and then create point lights
  • create a specular map one material at a time.  go back to photoshop and lower the brightness if the material is not reflective and raise the brightness on the material that are reflective. Add monochromatic noise to the specular map. Invert and set blend mode to screen and blur slightly.  You can also add a tint.
  • In Maya in the material attributes attach the file to the specular color
  • Use CrazyBump to make bump map
  • Use a Tangent Space Normals

good modeling practices

Hey guys,

Silvia asked us to come up with a list of good modeling practices that you should all be using for the current assignment and in general. Here’s what Angela and I have come up with so far. (Sorry this is a little late, we were having some difficulties with the blog.)

1) Delete the history every so often (This can be found under Edit >> Delete by type >> History). If your working with a deformer that you want to keep, you can also choose to delete Non-deformer history instead. Doing this will make Maya run a lot faster.

2) Model in quads. All faces should have 4 sides; if you make 5 sided faces (or greater), you will have a very bad time when you start texturing or animating your model.

3) (Similar to #2) Vertices should be 4-star (meaning they are connected to 4 edges). If you have vertices that are 5-star or greater texturing, etc will not be fun.

4) Get rid of extra random vertices by using the Delete Edge/Vertex option (found under the Edit Mesh menu). You can also select all the vertices on your model and use the Merge Vertices tool (Edit Mesh >> Merge).

5) If you’re making a symmetrical model, you can model half of your object and then mirror it (Mesh >> Mirror Geometry). Select the option box to make sure that you’re mirroring in the right axis. Your mirrored geometry can be merged with the half you modeled by selecting the “Merge with the original” checkbox.

6) Switch often between modes 1 and 3 (subdiv proxy mode) to see what your model will look like when you convert it to subdivisions.

7) If you want to merge vertices between 2 separate objects, you need to combine them into 1 object first. To do this, select both meshes and use the “Combine” option under the Mesh menu.

Depth of Field Bokeh effect using Mental Ray

1. Turn on Mental Ray

2. Create a camera, name it shotCam

3. Open Hypershade and click on the Cameras tab

4. MMB – Drag shotCam into the work area

5. Open the create panel on the left, expand mental ray > lenses, click “mia-lens-bokeh”

6. MMB drag “mia-lens-bokeh” onto shotCam, int the pop-up, click “dafault” for the input

7. In the Attributes editor you can play with the attributes of “mia-lens-bokeh”

Plane: This is the focus distance ( distance from camera to object you want in focus)

Radius: Larger = blurrier (bokeh amount)

Samples: increase to make it less grainy (bokeh quality)

Link to info about shader

To help with figuring out the focal distance:

when you create the camera also create a distance tool

Label the first locator (cam_loc), the second locator (cam_focus) and the distance (cam_distance).  Then in the outlier drag the locators and the distance under the camera.

You can the move the focus locator to the thing/area you want in focus. This is the value you place in the plane attribute of the lens shader.


Batch Render

To do a batch render:

Change the file output in the render settings:

change the frame/animation ext to name.#.ext and the frame padding to 3 (or equal to max digits you will have as frame numbers)

Then when you are ready to render go to the render file menu and select batch render:

This will create a folder with a bunch of still images in your project folder which you will then import into a program like After Effects as an image sequence.